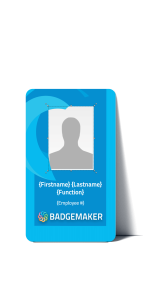
Create Card Designs in a couple of simple steps
BadgeMaker Design is part of the full-featured BadgeMaker package, that allows you to create your own professional card designs, including images , dynamic fields, shapes, logos, barcodes, signatures and passport photos.
Step 1: Create a new Card Design
Start a new card design in BadgeMaker Design and set your design preferences such as the card format, which can be a standard format such as CR80 card format or a custom format. Select whether the card should be single- or double-sided, with or without Magstripe, and whether your design is portrait or landscape.

Step 2: Add a background & logo
The next step in creating a card design is a background. Choose a blank background or use the shape or image tool to create a background. Add a logo image to the card to add your company’s identity. Use the image tool, click on the card design on your canvas and select your logo image. Resize the logo with the handlers in the corners of the image.
Step 3: Add Static & Dynamic text

After adding a background and logo, it’s time to add text to your card design. Use static and/or dynamic text. Use static text when a card design doesn’t contain personalized information, such as a gift card. Use dynamic data when a card design is for multiple employees. The layout remains the same, but the data changes for each printed card.
Step 4: Add a photo or signature
 To personalize a card, you can add an ID photo placeholder, which will be automatically associated with the cardholder ID photos in your BadgeMaker Identity project. A signature placeholder can also be added to your card design. The signature placeholder is also linked to the cardholder signatures in your BadgeMaker Identity project.
Get BadgeMaker and start to create card designs!


